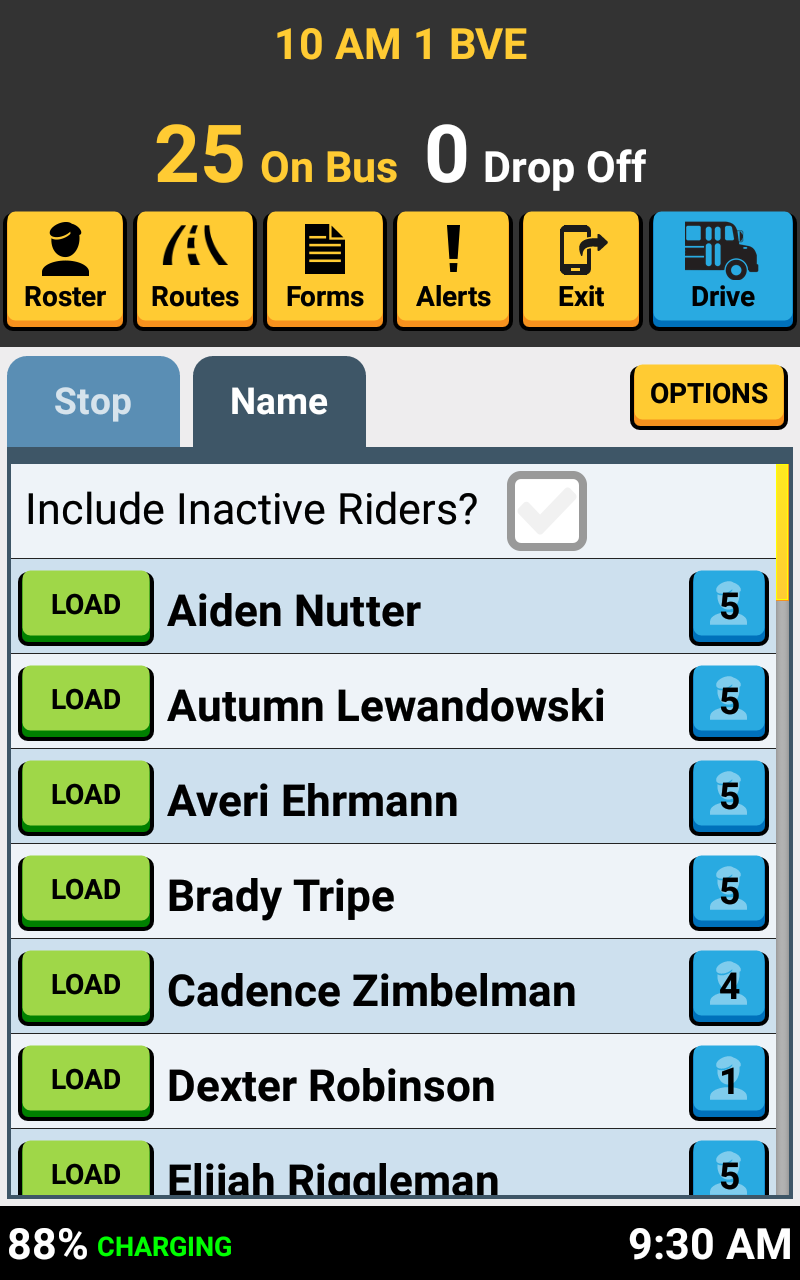
THE ROSTER SCREEN
While on route, the roster screen gives you crucial information about who is on your bus, and where they need to be dropped off.
Let's check out what you need to know about this portion of the driver app:


This number in yellow is the total number of students 'tagged' onto your bus. This number will go up/down as you load and unload students throughout your route.
# CURRENTLY ON BUS

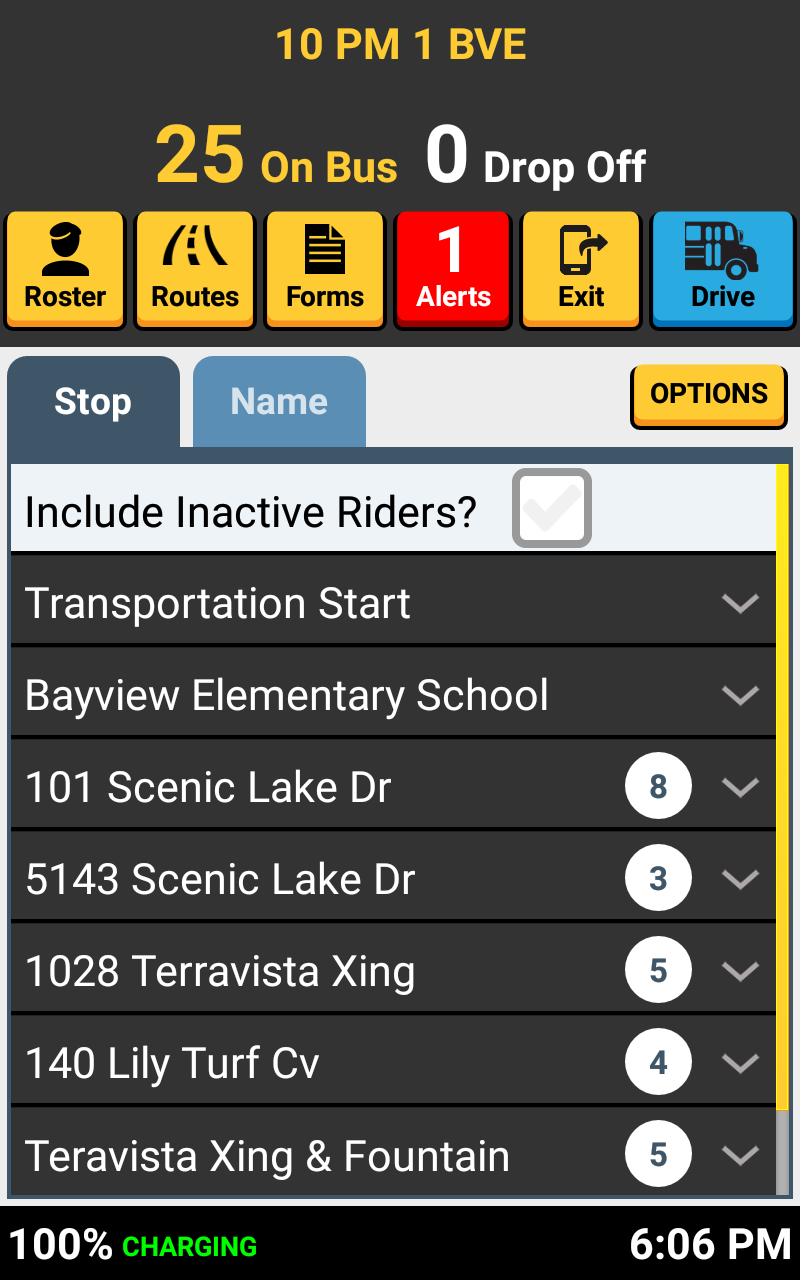
This is the number of students assigned to get off at the next stop on your route.
# OF STUDENTS AT NEXT STOP

This number tells you how many students are assigned to get off at a specific stop. Here, 8 students are set to get off at 101 Scenic Lake Dr.
# STUDENTS AT STOP NAME
Your current route number is shown here at the very top of your screen. Your route number will automatically change as you transition to your next route
ROUTE NUMBER
This is the 'Stop' tab. When this is selected, you can view a list of your stops, with the # of students assigned to UNLOAD at each stop.
STOP LIST TAB
You can tap a stop name on this list to see what students need to get off at this stop.
QUICK TIP


Tap the 'Name' tab to switch to an alphabetic sorted roster list. You can scroll up and down this list to search for students on your route.
NAME TAB
If you cannot locate a student on your route, try checking this 'Include Inactive Students' box. If a studnet does not ride the bus for 30 days, they will be set in SMART tag system as 'Inactive'.
These students are still eligible to ride your bus, and if you do load them, they will be set back to an 'Active Rider'.
INACTIVE STUDENTS


That's it!
Head back to the tutorials page to learn more about using SMART tag on your bus routes.